

Loving the wallpaper trend and looking to add some life to your walls but you have (cue melancholy music) TEXTURED WALLS? Don’t go crying into the drywall just yet! For those beautiful intricate wallpaper designs there are plenty of wallpaper gurus you can hire to remove the texture and apply wallpaper to new, smoothed walls for you. BUT if you’re just wanting a simple wallpaper pattern and looking to save some money while working with the walls you were given there is hope for you! Instead of paying several hundreds of dollars for wallpaper and installation I’ve been able to create simple wallpaper-style accent walls that I LOVE all on my own using just a few tools, and all for around a hundred fifty bucks total. Yes, you read that right, and I’m still not over it.
*On a quick side note, allow me to introduce you to that happy girl in the photo, Penny. She’s our family “pup” of 6 going on 7 years and I created this special space in our home just for her because she’s the sweetest girl and so great with our babies despite often coming last in attention after them. I wanted her to have something just for her as a reminder of how loved she is.
Apparently, wall-stenciling is one of my weird pregnancy cravings because the first time I took on this challenge I was pregnant with my first baby. The wall was so large I swore I’d never do it again…then 4 years later I did it again, this time while pregnant with my 3rd baby. My 1st attempt was the golden wall (also textured) below for my daughter’s room, and my most recent was the fun teal wall featured in this post.

Up for the challenge?! Read on for my must-haves and top tips for stenciling your own textured walls!

1. PATIENCE: Completely free!
You’ll want to remember that wall stenciling and textured walls are not soul mates – they were not meant to be together so at times making them work will require some patience. The biggest obstacle is that laying a flat stencil onto a “lumpy” canvas can prevent the stencil from laying flat. This can lead to paint bleeding, so the process of preventing that can be more tedious than it would be on smooth walls. The good news is that you can still make it work and create a beautiful wall you’re proud of!
2. Paint Samples: $4 each at Lowe’s
Once you have your Pinterest board full of color inspo, take your time selecting a few sample paints to take home and try on your wall. One for the wall, and one for the stencil. Apparently I took a risk in using such contrasting colors, because it’s best practice to use low contrast colors which are more forgiving of the imperfections that can come with textured walls. However, my texture isn’t as harsh as texture comes, so I think that plays a large role in my exception. For super lumpy texture, stick to low contrast colors. For softer texture, take a risk! The great thing about painting is that you can always change it if you don’t like it. A few other top things to keep in mind:
Lighting matters!
Make note of the lighting in the room you’ll be painting – is the source of the room’s illumination fluorescent, incandescent, or LED lights? How much natural light does the room get? Be cognizant of this and consider what kind of light you’re under the paint or hardware store. If your room uses incandescent bulbs and gets a ton of natural light during the day, the paint color is going to look different than it looks under LED lights in the paint or hardware store. Here’s a quick chart that shows the differences in color based on the lighting:
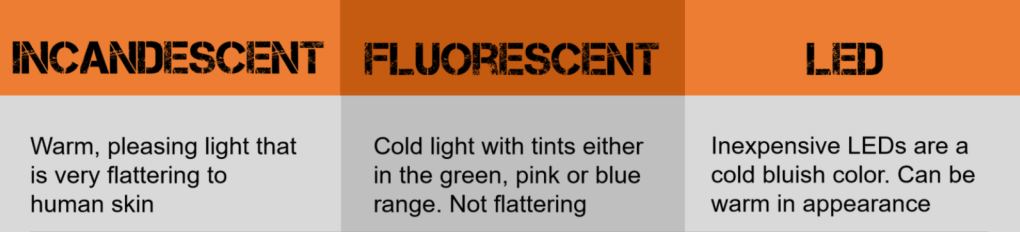
50 Shades of Color
Fortunately, most paint and hardware stores are aware of the different lighting in our homes, so they’ll have a dedicated display of various lighting that you can hold your color swatches underneath to get an immediate visual of what that color looks like under various lighting. So helpful! Regardless of whether or not that’s the case, in order to find that perfect color my advice is to get a paint sample of the color you love, plus a lighter and darker version of it, usually the colors on either side of the same paint swatch or an adjacent paint swatch. Over the years this has helped me account for the difference in color I see once it’s actually on the wall.
3. Final paint colors for the wall and the stencil: $50 for a gallon/$13 for a quart of Valspar paint from Lowe’s
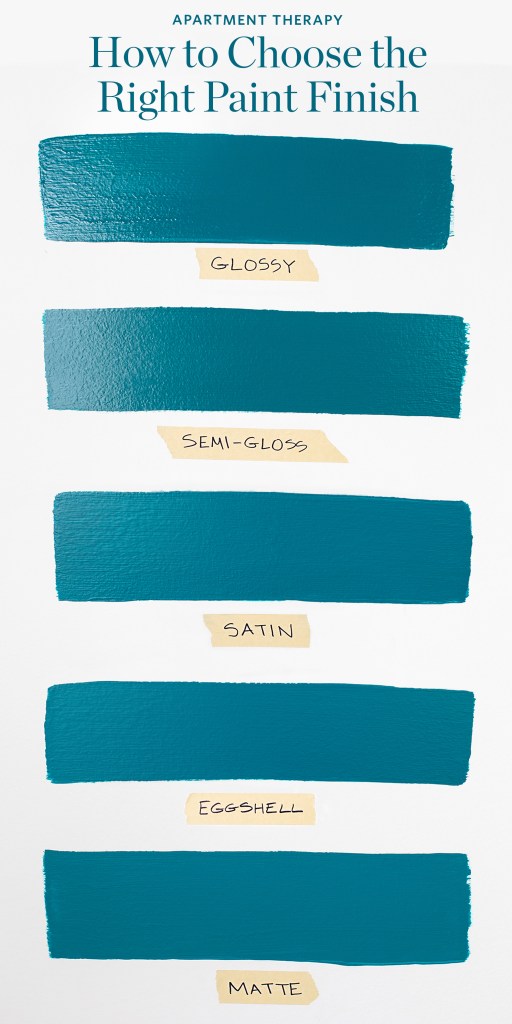
Once it’s time to buy the winning paint color be sure to also decide on the finish you want – there’s flat/matte, eggshell, satin, and gloss. I know, between lighting and paint finishes it can seem like a simple project just got overwhelming, but stick with it! Once you get some practice playing with lighting and finishes you’ll see it’s not so bad. Here’s another handy chart to give you an idea of how the different finishes affect the way your paint looks.
There are also guides that give tips on the recommended paint finish by room, depending on the type of room you’re painting and the traffic it receives. Here’s a great resource I found on Valspar’s website:

To help hide any imperfections that can come with painting a pattern onto textured walls, I recommend an eggshell finish. This is what I used and when you look at my accent wall you wouldn’t even know the walls are textured!
Lastly, I’d recommend buying paints that include primer to spare yourself the added time of having to prime the wall before you can paint it. The paint + primer combos by Valspar have been my go to for the last 10 years or so that I’ve done my own painting, and they’re available at Lowe’s. Let your paint dry overnight to make sure your wall is completely dry and that you’re still in love with the color before applying your stencil.
4. Painter’s tape: $5
You’ll need painter’s tape to prevent paint from bleeding onto your baseboards and the walls opposite your accent wall. I also used painter’s tape to secure my stencil to the wall. There’s adhesive you can use but I felt more confident that painter’s tape would hold the stencil better and reduce the risk of taking my paint off the wall when removing the stencil.
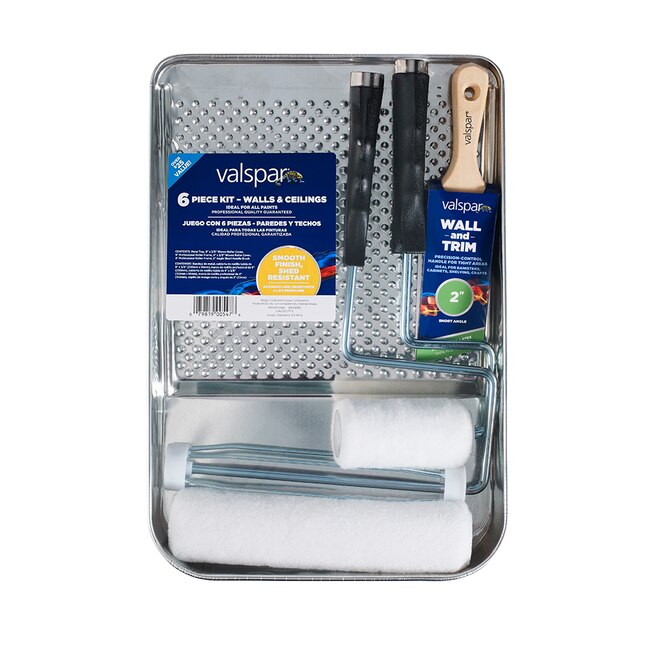
5. Paint tray, roller and roller cover set: $10-$20
Most hardware stores will have these handy kits that come with everything you need to paint a wall. Most recently I went with Valspar’s 6-Piece Paint Roller Kit.
6. Plastic drop cloths: As low as $3-$10
This will protect your floors from rogue paint, which is especially important if painting carpeted rooms.
7. Dauber brushes: $6-$8
Many wall stenciling instructions call for applying the stencil paint with a small roller, but lucky for you I tried it out and failed so that you don’t have to. I experimented with both a roller and a dauber brush, and personally I liked the dauber brush better. These cute little brushes gave me more control over the paint spread and created significantly less paint bleeding. Important rule: a little goes a long way! An additional way to reduce the bleeding that can come with textured wall stenciling is to keep the amount of paint on any brush you use to a minimum. Test it out first to see what works best and then apply that volume to the remainder of your stenciling.

7. Sponge: $5
I liked having a simple sponge on standby to use for touch ups. You might find it easier than trying to touch up with a brush because the hard sponge is less flexible and less fibrous. In many spaces where there was excessive paint bleeding around one of my herringbone designs, I simply dabbed my sponge into a bit of the wall paint and smoothly painted over the bleeding – voíla! No more excessive paint, just clean stencil lines.
9. A damp wash cloth: $0, already sitting in your laundry room
Throughout the process, there’s bound to be a few (or several) whoopsie moments. Keep a damp cloth on hand to quickly wipe away any paint spills or excessive bleeding before they dry.
10. A wall stencil you love: $35
I must start off by saying that painting your own wallpaper-inspired wall (ESPECIALLY on textured walls) works best when using simple patterns that can easily be replicated in a single stencil used over and over across your wall. If you’ve been eyeing a wallpaper that depicts a garden scene in a Victorian-era setting, painting it yourself is probably not the best route to take. You’ll want to choose a simple pattern that can be painted in one color.


The left image below is the wallpaper I was inspired by and the right image shows the stencil I decided on. Couldn’t be happier!
I’d recommend a stencil that’s large to reduce the amount of times you have to remove and re-apply, as well as user-friendly, making stencil placement as seamless as possible.
I chose one by Stencilit and loved it! Their stencil was large, super easy to re-apply, nice and flexible for when I needed to bend it for the corners and bottom of the wall, and it came with great instructions and tutorial videos for extra support. Highly recommend!
Time to paint!
The baseboards and walls are taped off, your drop cloth is on the floor, your brushes are ready, and you have paint colors and a stencil you love – your masterpiece awaits. My personal choice has always been to start with my stencil placed in the top left corner of the wall and to stencil all the way down the wall before making my way to the right. If you complete your wall stencil before you’ve reached the bottom or the corner of the wall you can be the judge of what you think looks best – you can either leave those portions of the wall un-stenciled (which I think works if no one’s going to see the bottom of your wall anyway) or bend your stencil in order to finish the pattern all the way down to the baseboards and into the corners of the wall.
Throughout the process, don’t be afraid or upset if you need to just wipe off or paint over something and do it again. It’s worth getting it right! Then, once you’re done, take a step back admire the work of art that is your accent wall and be proud of the fact that you created it on your own!
I hope this is helpful to anyone setting out on a stenciling journey of their own, and if you have any questions about stenciling a textured wall or want to brag about your own experience I’d love to hear from you in the comments below!

Follow my family on Instagram as we navigate the chaos of raising cubs @cubsandchaos. 🤎


This is so cute! Love the colors
LikeLiked by 1 person
Thank you! (Our pup is quite happy with it too. 🤭) This was such a fun little project. Can’t wait to do more!
LikeLiked by 1 person